Saved Reports
Only available on our Business Plans.
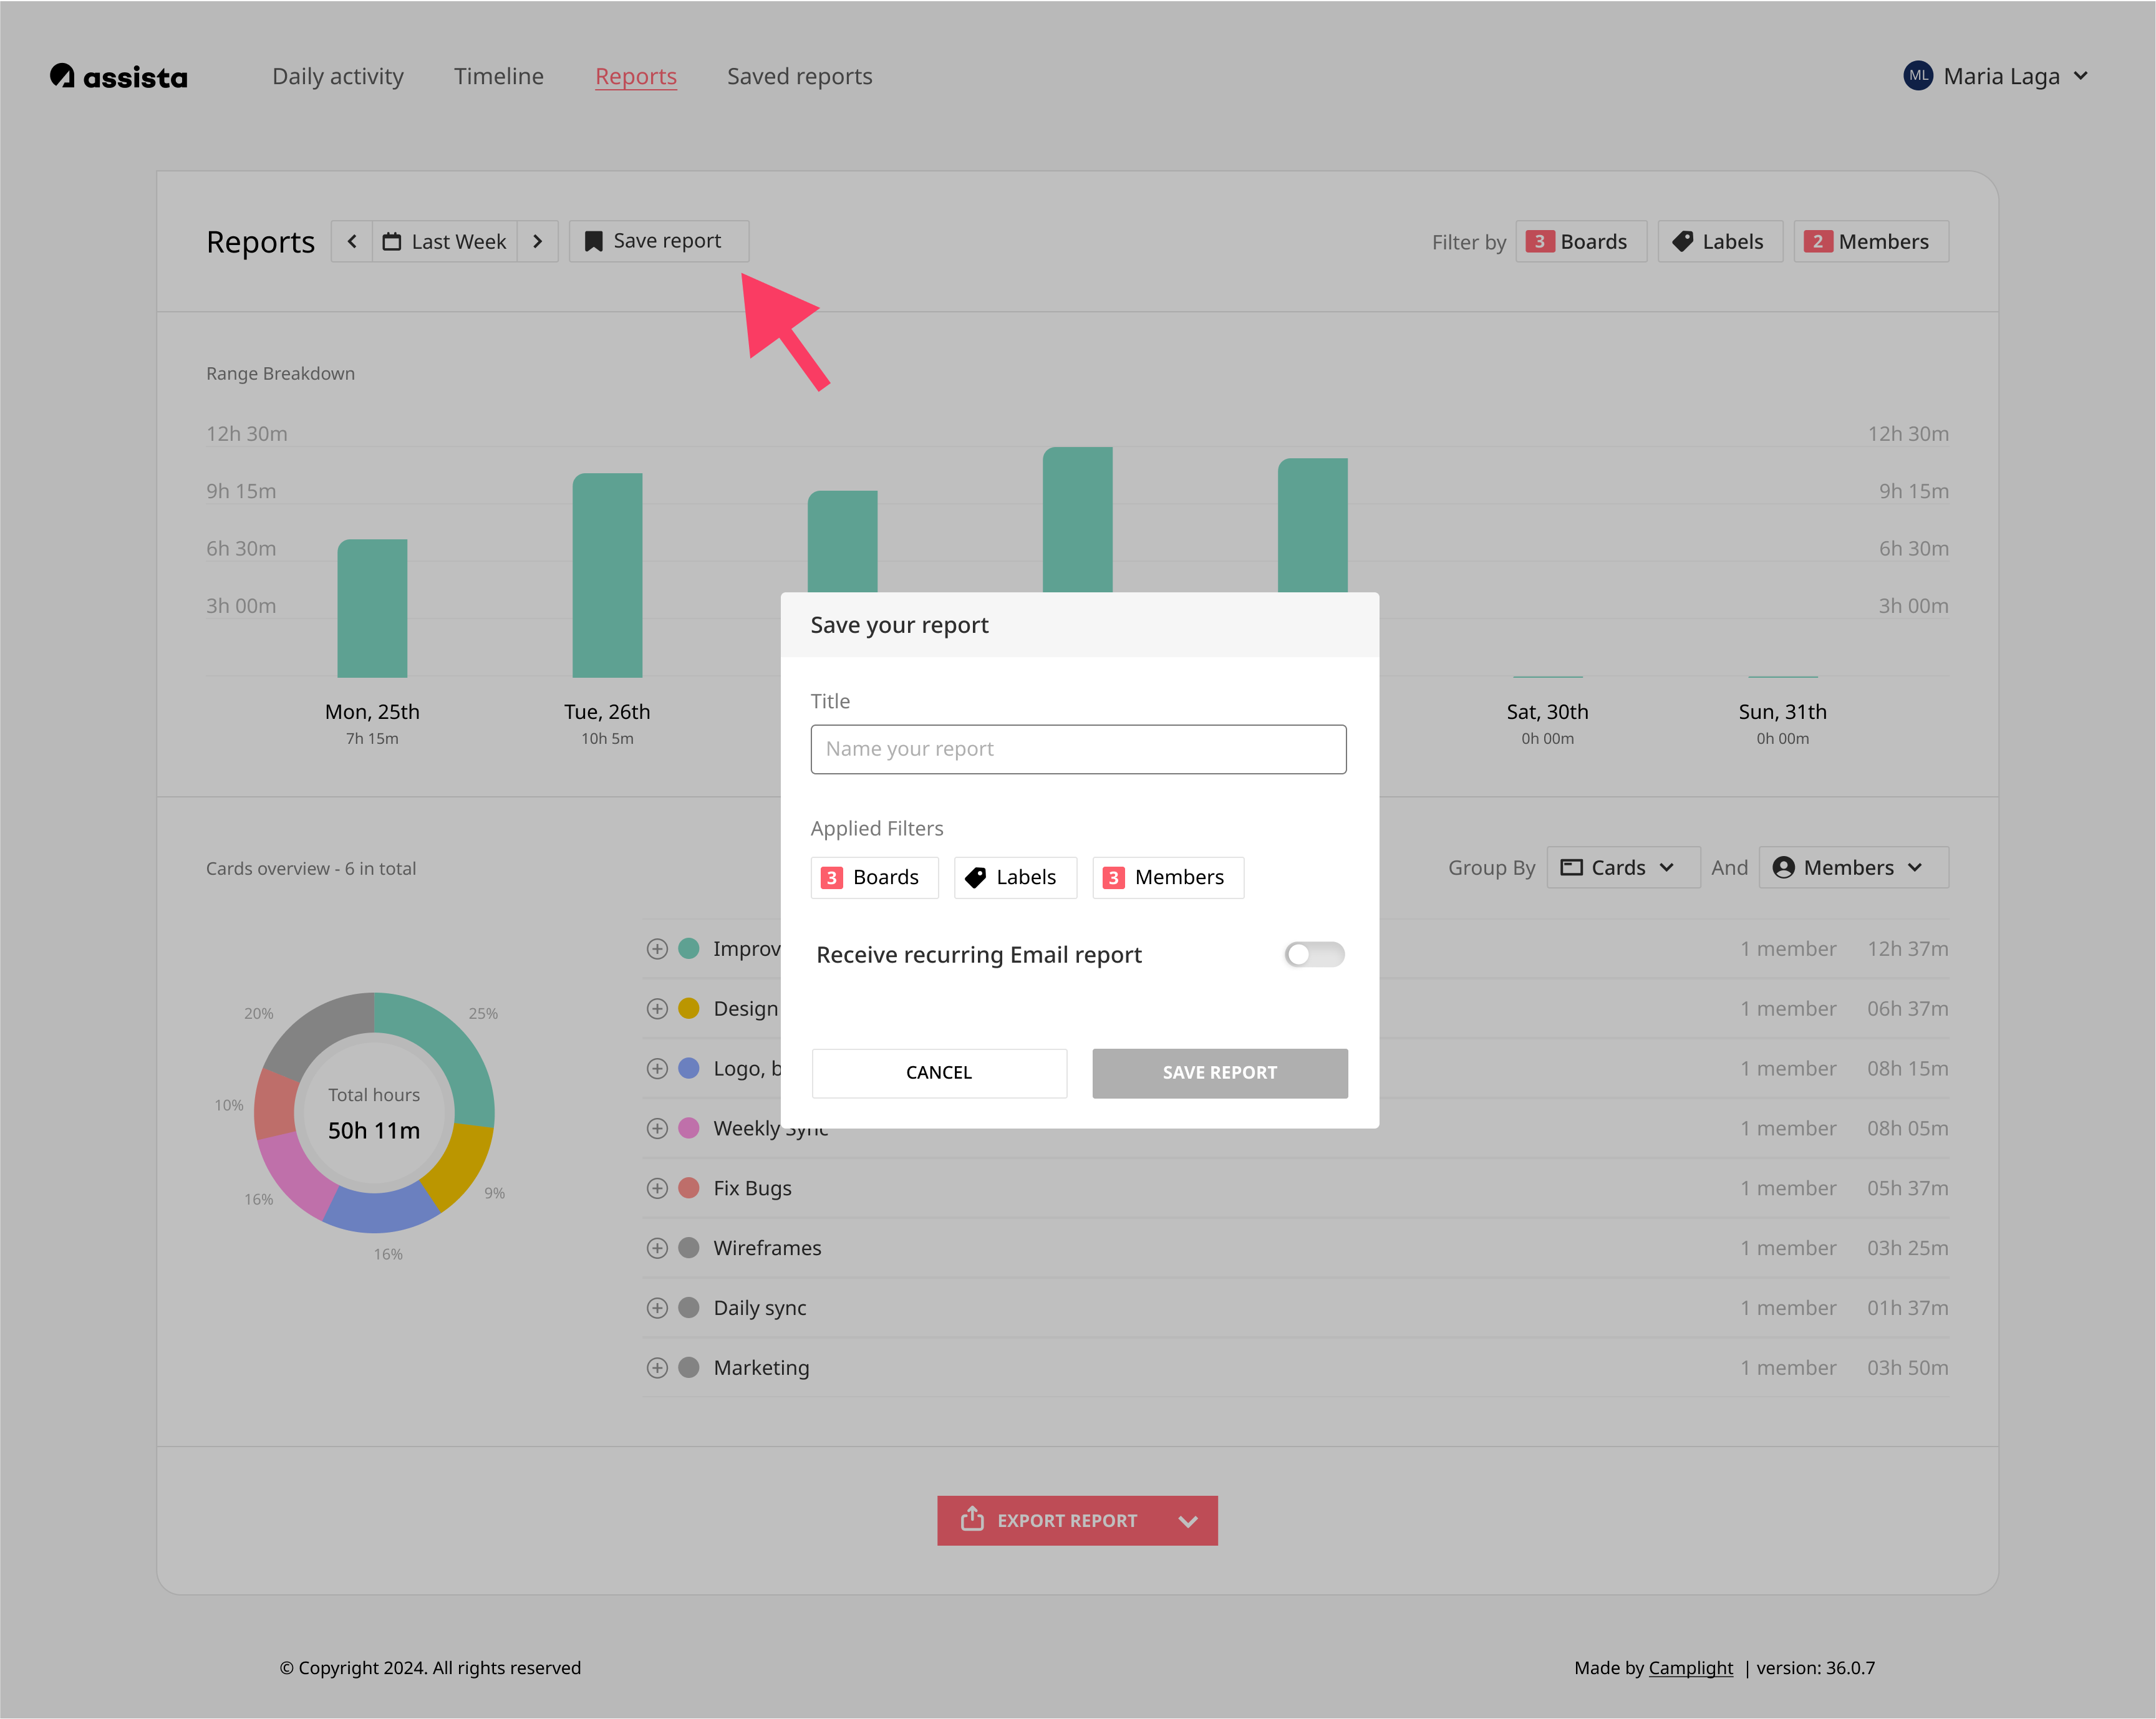
Saving a report lets you skip the hassle of setting up filters each time you want to check on your team's progress or export reports for clients. Just save your preferred filters - like "Boards," "Labels," and "Members" - and they'll be ready whenever you need them.
Saving a report

- Select Your Filters: Customize your report by choosing the filters you want to save.
- Press the "Save Report" Button.
- Choose a Title: Enter a title for your report.
- Review Your Selected Filters: Double-check the filters you've chosen.
- Save Your Report: Confirm and save your report settings.
Setting a recurring report

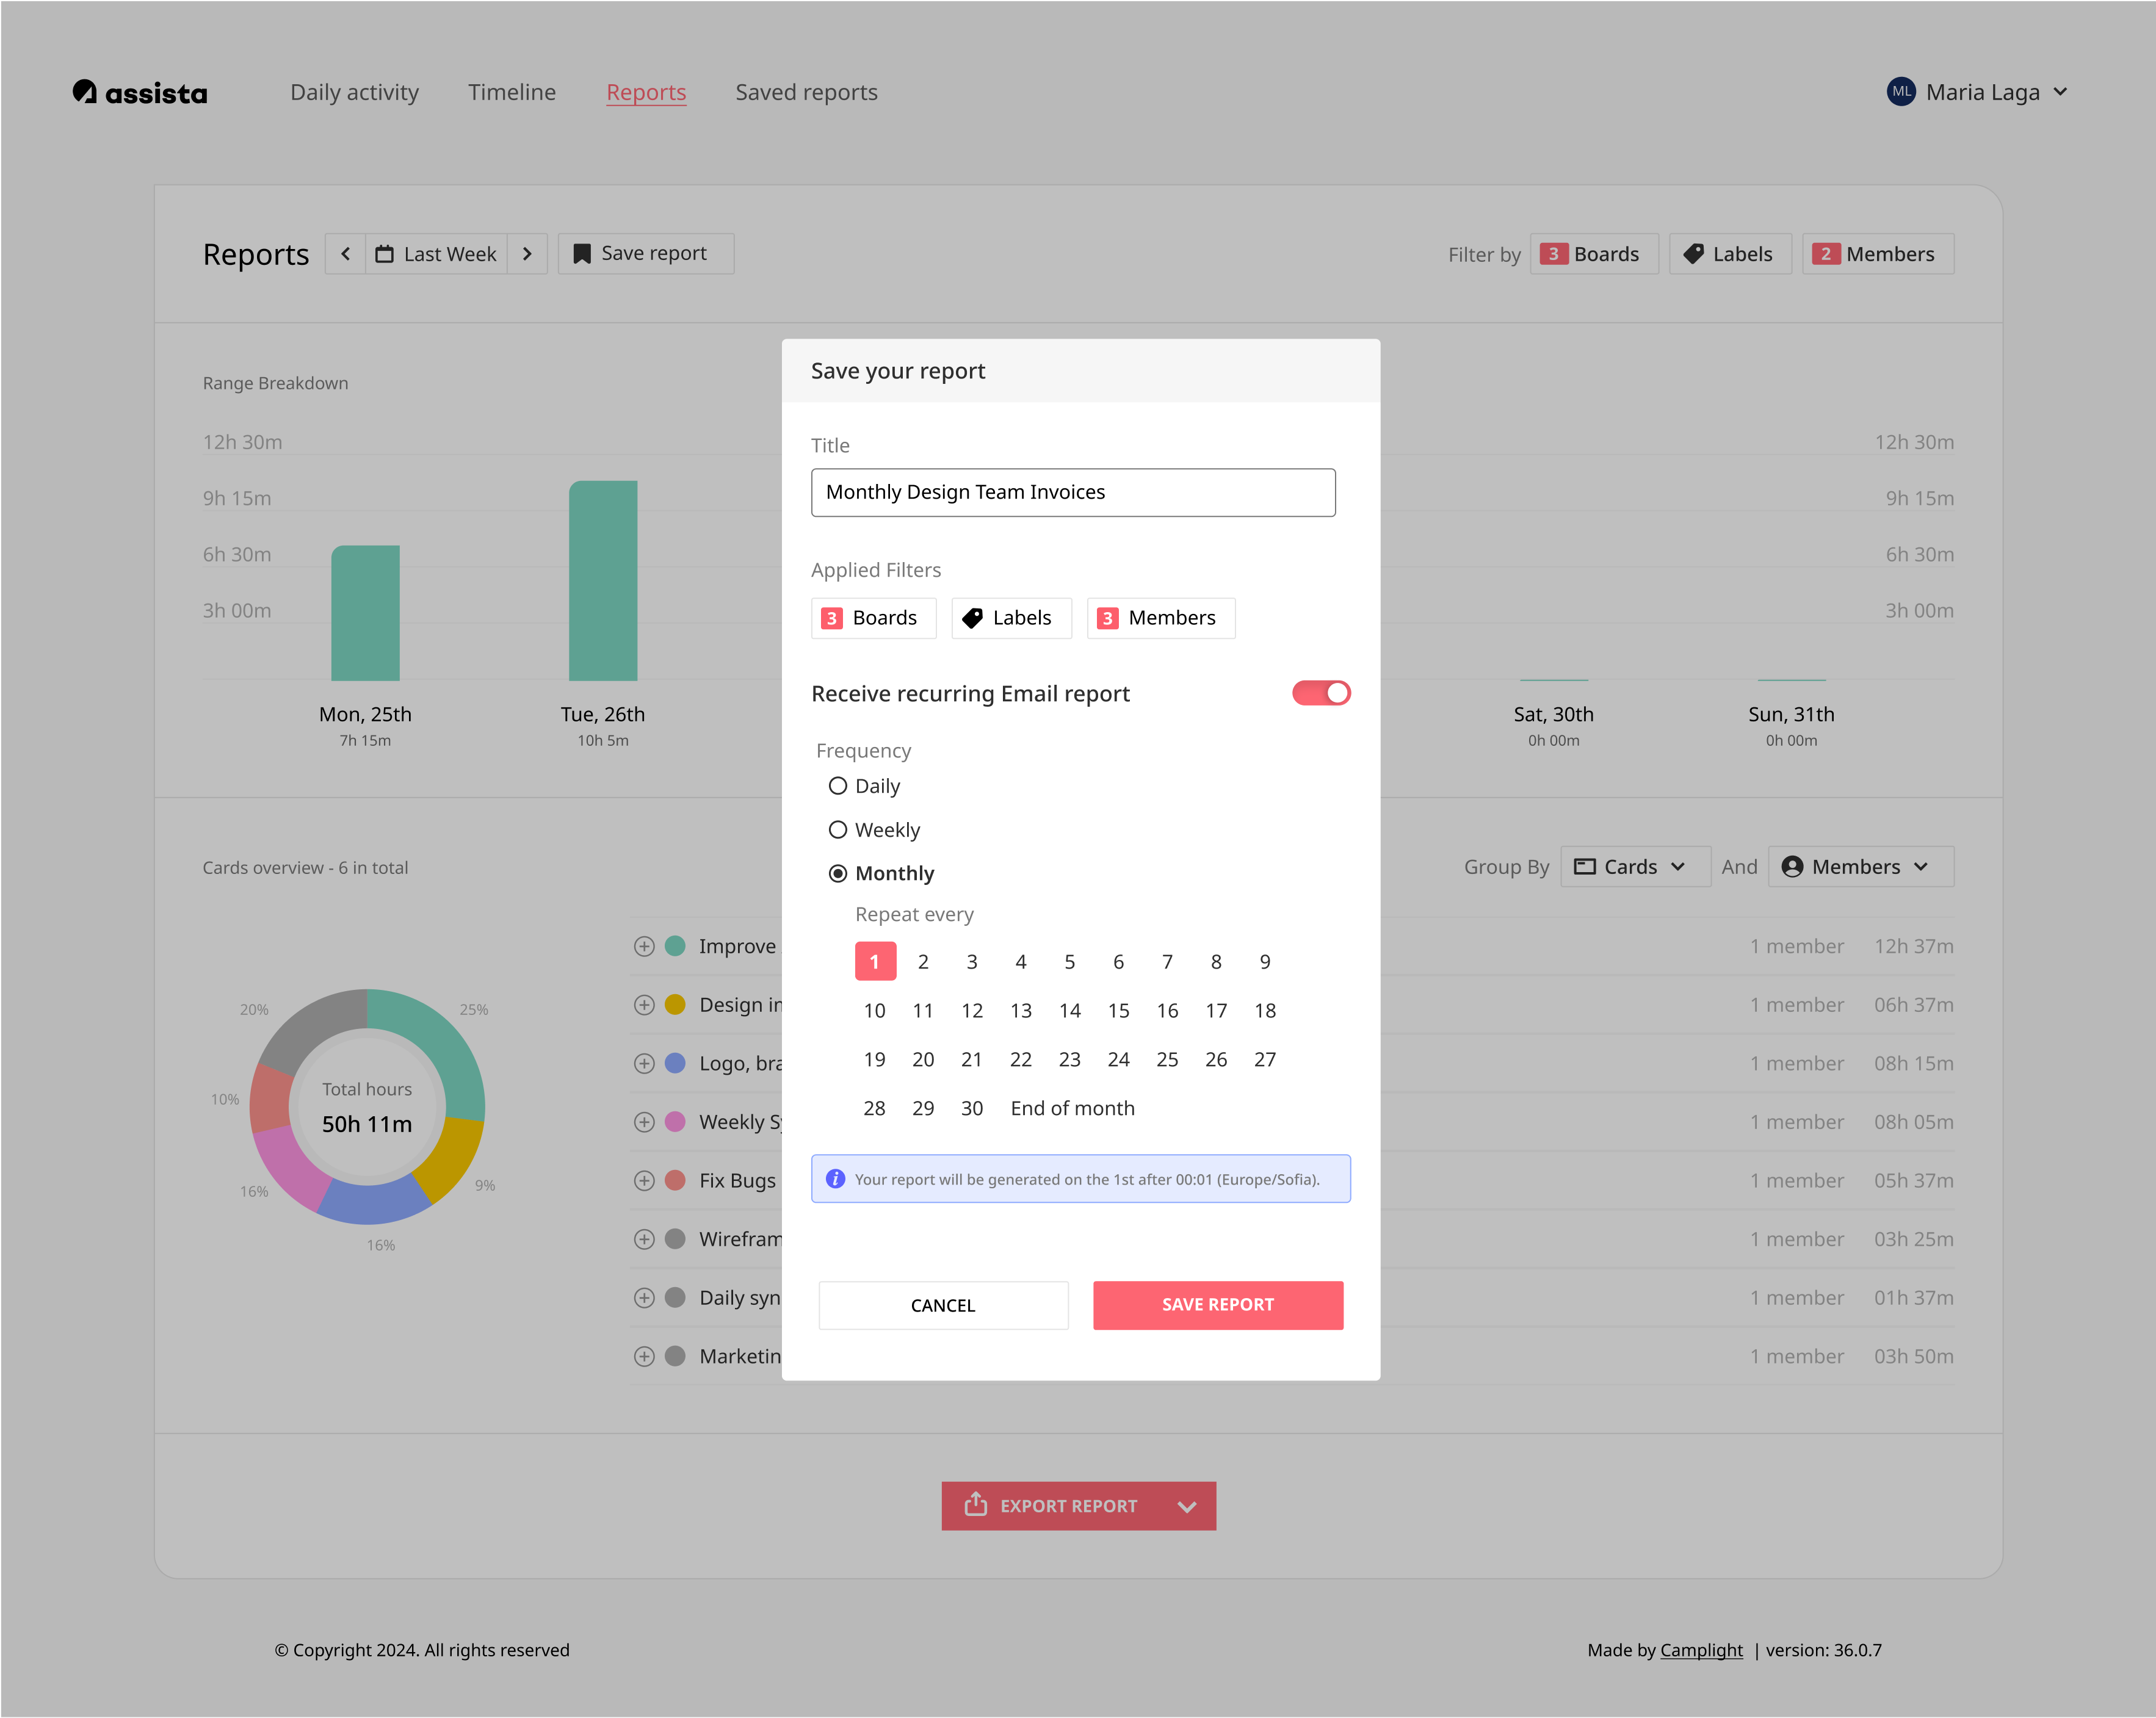
To receive automated email reports, toggle "Receive Recurring Email Report" to ON. You can then choose how often you'd like to receive the report: Daily, Weekly, or Monthly. For each option, you can select a specific day for the report to be sent.
The email will include an attached XLS file and will be sent shortly after midnight on the selected day.
Important: If you want to receive a Monthly report that includes the entire previous month (e.g., from the 1st to the 30th or 31st), make sure to schedule it for the 1st day of the month. You will receive it at ~ 00:01 on 1st of the Month, after the whole month has passed at midnight.
Viewing the saved reports list

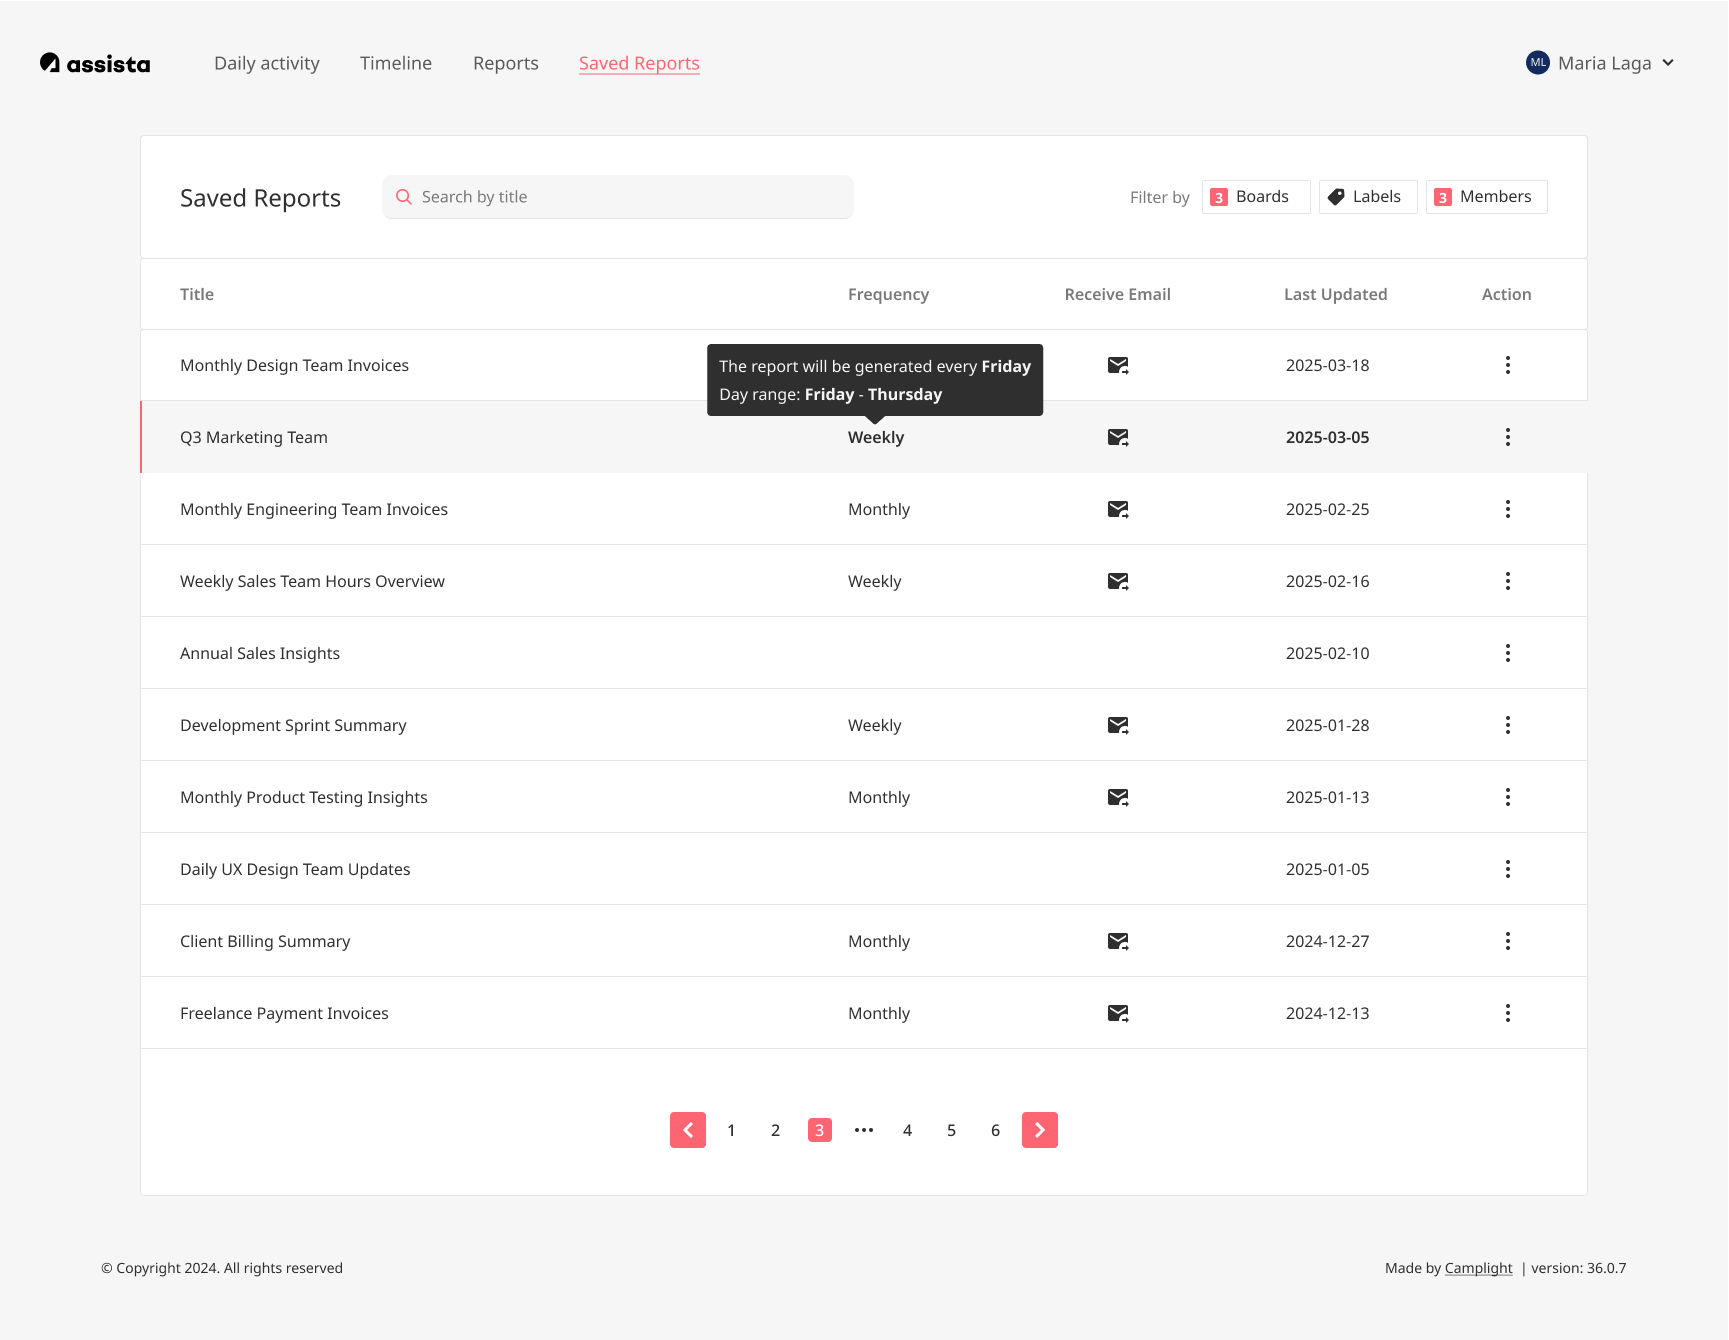
To view all your saved reports, go to the main menu and select "Saved Reports." The list will display all your saved reports, organized by title and date. To manage your reports, you can click the menu (three dots) next to any report. From there, you can select "Copy Link" to share the report, "Edit" to change your report settings or "Delete" to remove it from the list.
Retrieving a specific saved report
To view your saved report in detail, go to "Saved Reports" choose the report you want to see, and click on it. The report will open for you to review.
In the Detailed Saved Report view, you can:
- View Report Data: See your report based on the filters you have selected.
- Adjust the Time Period: Change the time period as needed to customize the report.
- Share and Delete: Use the menu next to the filters to copy the report link for sharing or to delete the report.
- Break Down Your Report: Use the Grouping feature to organize and view your report data in a more structured way.