What you can do with Assista in Trello
When you add Assista to a Trello board, you will get a few features added to the Trello interface:
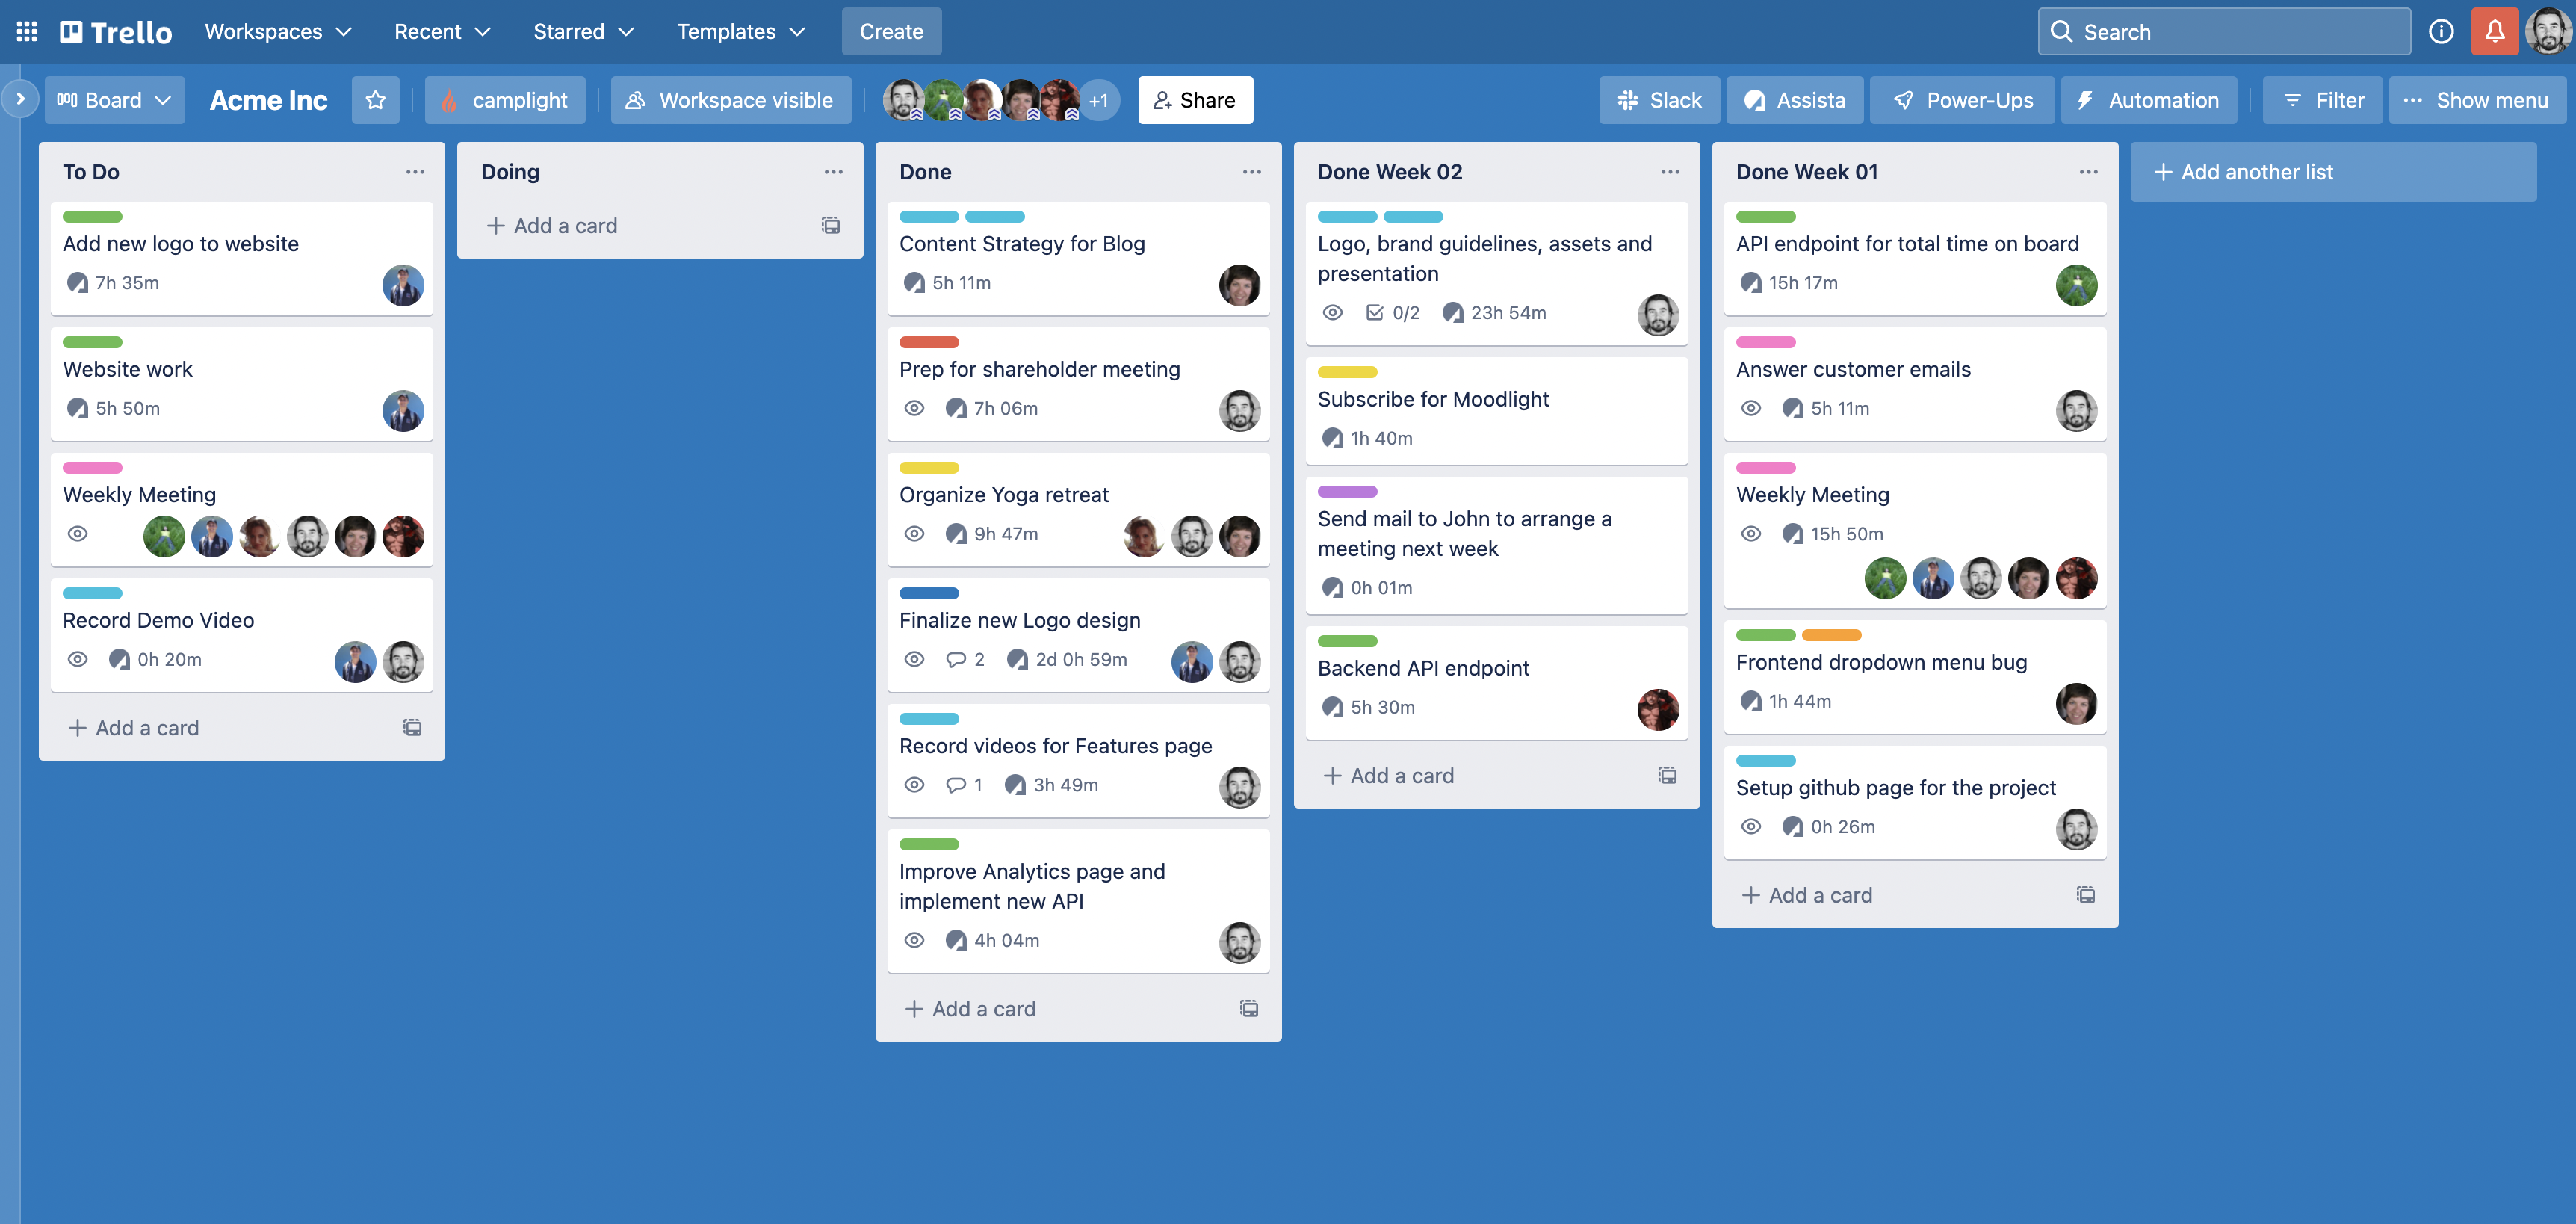
Assista board button
- Assista button on the top of the Trello menu where the Power-Ups are situated.
- Clicking the Assista button opens the Assista Dashboard with the Daily Activity, Timeline and Reports views.
Card badge and card back section
- Each card with some time tracked on it will have an Assista icon and the total time spent by all team members for that card.
- When you open a card, you will see a card back section added with information about how much time each member of your team worked on that specific card.
- When a member moves a card to a tracking list, Assista will show a green dotted animated line around the user's avatar.
Card button and time comments
- Each card has an Assista button that can be used to add or remove time.
- You can also add or remove time by adding a time comments
Time tracking for all card members
Time tracking for all card members lets Assista track time for everyone assigned to a Trello card. Add the members you want to track to the card, then enable the setting to start time tracking all card members.
How to set up your Trello card to track time for every member
- Open the Trello card where you want to enable multi-member tracking.
- Add all the members you want to track to that card.
- In the Assista field, click the small group-icon button on the right and enable "Time tracking for all card members."
- Move the card to your tracking list to begin tracking.
💡 If your card is already in a tracking list, just move it to another list and then back again - that's how Assista activates the setting.
How to disable it
- Click the same button
- Disable the setting
- Move the card out of the tracking list